3/21/2026
Woodworking 101 - Part 6 - Let's talk wood: Getting into the grain
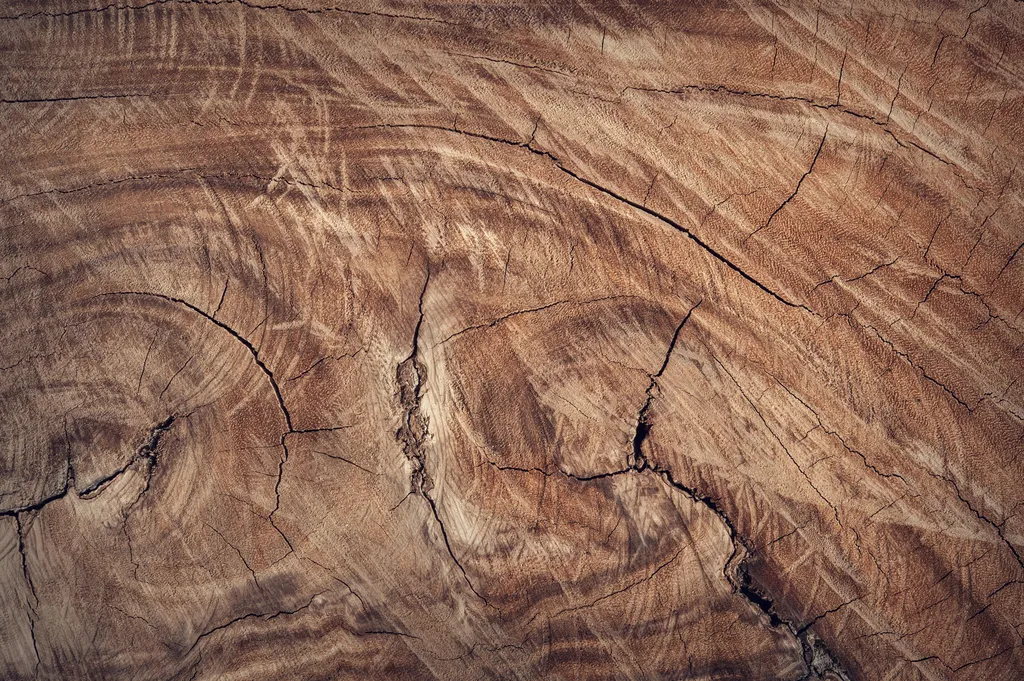
Image by:
FWStudioNow that you know all about the different types of wood, let’s talk about wood grain.
If you’ve ever stood in front of a freshly cut board and admired those little lines running along its surface, you’ve already met wood grain. It’s one of those things every woodworker hears about right away, but it can feel a bit mysterious at first.
So let’s clear it up. Grain is simply the pattern of wood fibers as they grew in the tree. The way you cut, shape, and finish wood depends a lot on how those fibers run. For beginners, understanding grain is like learning the traffic rules of woodworking, it keeps things from going off the rails.
Why grain matters
- Strength and stability: Wood is stronger along the grain (the fibers) than across it. That’s why a table leg can hold weight if the grain runs lengthwise, but would snap if you cut it the wrong way.
- Looks and style: The grain gives wood its character. From the straight lines of maple to the swirls in walnut or oak, grain is what makes each board unique.
- Workability: Cutting, planing, or sanding “with the grain” usually feels smooth. Go against it and you’ll fight tear-out, roughness, and frustration.
Crosscut vs. rip cut
This is one of those grain-related details that beginners run into early.
- Rip cut: Cutting along the grain, lengthwise down the board. Think of it as slicing a log into strips. You’re cutting through fewer fibers, so the saw blade follows the natural lines.
- Crosscut: Cutting across the grain, shortening a board. Now you’re cutting through all those fibers at once.
Why does this matter? Tools and blades are often specialized:
- Rip blades: Fewer, larger teeth that remove material quickly and follow the grain. Great for long cuts along solid wood.
- Crosscut blades: More, smaller teeth that slice cleanly across the fibers. Perfect for shortening boards without tearing out the ends.
- Combination or general-purpose blades: A middle ground. Fine for most beginner work and especially practical for engineered woods, where you don’t always know how the fibers run. They handle plywood, MDF, and particle board well, though thickness plays a role. The thicker the material, the more you’ll appreciate having the right blade.
- Specialized blades: Designed for specific tasks (like laminates, plastics, or ultra-fine finishes).
Rip and crosscut blades are still the most common special-purpose options. They not only give cleaner results but also reduce wear and tear on your saw, especially when cutting harder or thicker woods.
Start with a good universal blade and get to know its limits. As your projects get more ambitious, you’ll naturally discover where a specialized blade saves time, effort, and frustration.
Face and edge grain… the strong and the steady
Most of the time, you’ll be working with either the face or the edge of a board.
- Face grain: The wide surface of the board where you see the nicest figure. It glues and finishes very well and is usually the show side of a project.
- Edge grain: The long, narrow side. It’s strong and stable, glues almost as well as face grain, but looks plainer. Often used in things like cutting boards or drawer sides where durability matters more than figure.
End grain… the thirsty sponge
If you’ve ever put glue on the end of a board and wondered why it disappears instantly, here’s why: end grain is just exposed straws. The fibers run lengthwise in the tree to transport water and nutrients, and when you cut across them you open all those little tubes. That makes end grain:
- Super absorbent: It soaks up glue, stain, or water much faster than face grain or edge grain.
- Tricky to finish: End grain tends to go darker with stain and needs more sanding to look smooth.
- Poor holding strength: Because the fibers are cut open, glue gets sucked deep into the tubes instead of forming a strong bond on the surface, and nails or screws just push between the fibers without much to bite into. That’s why joints relying only on end grain contact are weak.
Bending… wood on the move
Wood might look solid, but it’s a natural material that still behaves like part of a tree. One of the biggest lessons for beginners is that wood moves, it bends, swells, and shrinks depending on moisture and grain direction.
- Along the grain (lengthwise): Wood barely changes in this direction. A 1-meter board will stay about 1 meter long, even if humidity shifts.
- Across the grain (width): This is where things get interesting. Boards expand and contract across their width with seasonal changes, and the orientation of the growth rings makes a difference. Flat-sawn boards (with wide rings across the face) tend to cup more, while quarter-sawn boards (with rings running straighter) move less and stay flatter. There are clever ways to deal with this movement, but that’s a topic for a later post.
- Bending strength: Wood is much stronger and more flexible along the grain than across it. That’s why you can bend a thin strip of oak for a chair back, but if you try bending across the grain, it just snaps.
Think of it this way: grain direction is like the grain in fabric, pull along the threads and it holds, pull across and it stretches. Wood is no different, and planning with this in mind keeps your projects from twisting or splitting later. The forces at play are surprisingly strong; seasonal movement can bend screws or nails without much trouble, which is why understanding and respecting grain direction is so important.
The big picture
Grain might sound like a small detail, but it’s the difference between a clean, sturdy project and one that splits, tears out, or doesn’t hold together. Paying attention to grain direction helps you:
- Choose the right blade or tool for the cut.
- Plan stronger joints that last.
- Avoid surprises with glue and finishes.
- Appreciate the beauty in every board you pick up.
Up next
In the next part, we’ll finally start talking about joints, the real building blocks of woodworking. From the simple butt joint to more classic connections, you’ll see how understanding grain makes all the difference in why some joints fail and others last generations.
Explore the series:
- Woodworking 101 - Part 1 - Getting powered up
- Woodworking 101 - Part 2 - Let's go shopping: protective gear
- Woodworking 101 - Part 3 - Let's go shopping: workshop essentials
- Woodworking 101 - Part 4 - Let's go shopping: power tools
- Woodworking 101 - Part 5 - Let's talk wood: materials you'll meet
- Woodworking 101 - Part 6 - Let's talk wood: Getting into the grain
I hope you enjoyed the read, and if not, that's fine too! Feel free to share your thoughts or reach out on Instagram, Mastodon, Bluesky or MakerWorld. I'm always happy to hear feedback: good, bad, or sheep-themed.